Part 1 – Your First Bot Application
A big focus of the Microsoft BUILD Conference this year was Artificial Intelligence. Branded as Microsoft Cognitive Services, Microsoft’s AI offerings include 29 different services, ranging from custom search to computer vision to natural language processing to bots. In this series of blog posts, we will focus on the Microsoft Bot Framework.
To start developing with the Microsoft Bot Framework, you need to have Visual Studio 2017 installed. If you do not already have Visual Studio 2017, you can download the free Visual Studio 2017 Community Edition. You will also need to download the Bot Application project template. Do not unzip the package, just move the zip file to your Visual Studio 2017 project templates directory:
![]()
You will also want to download and install the Bot Emulator. The emulator allows you to run and test your bot application without deploying it anywhere.
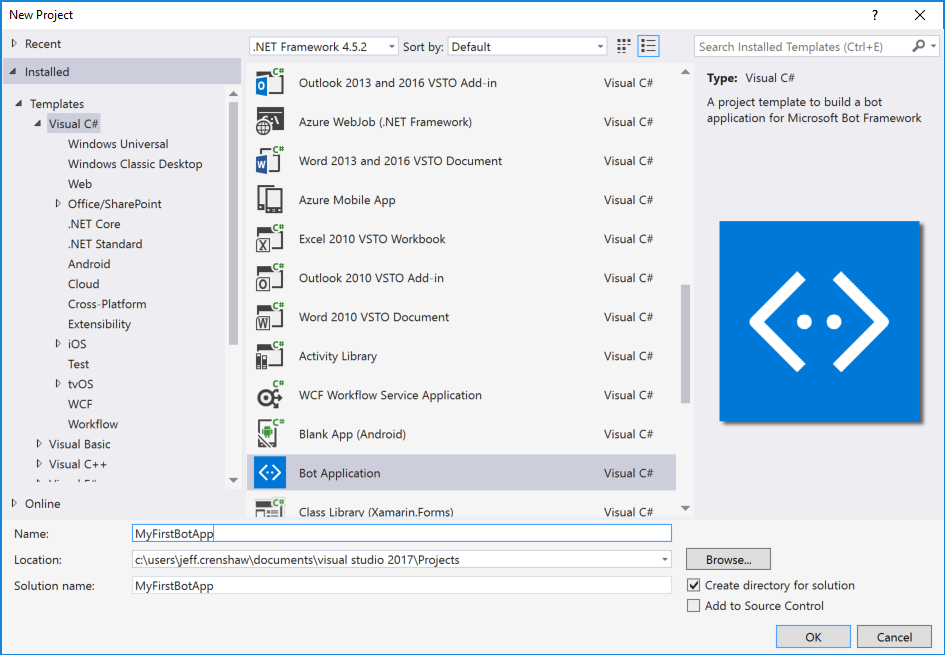
Start Visual Studio 2017 and create a new project. In the New Project dialog box, select Visual C# Templates, and select Bot Application. Name your project and select OK.
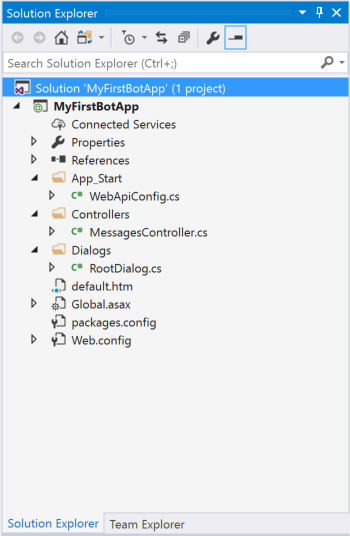
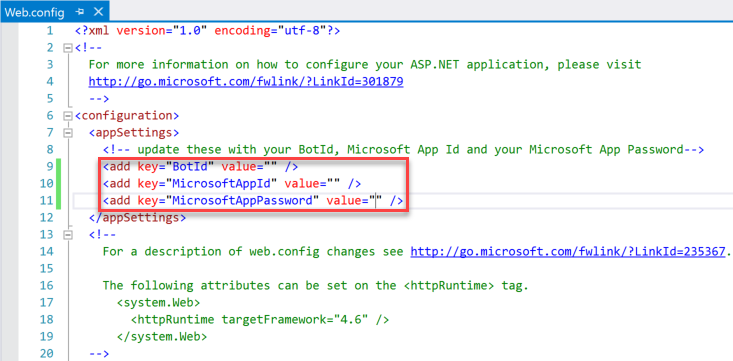
When the project is created, notice the files that are created in Solution Explorer. Open web.config and find the settings for BotId, MicrosoftAppId, and MicrosoftAppPassword. To develop and debug locally, you leave BotId, MicrosoftAppId, and MicrosoftAppPassword blank. When you are ready to deploy your bot app, you will need to register it to get real values. We will cover that process in a future post.
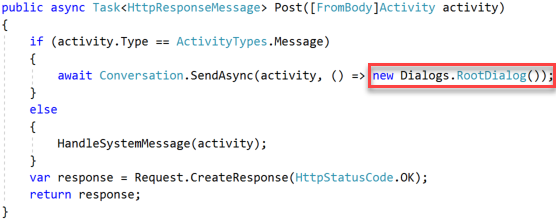
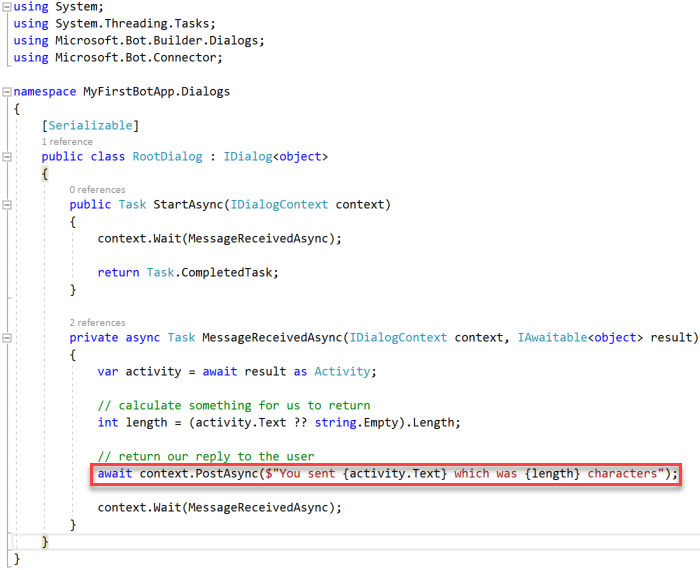
Next we will take a look at the MessagesController, in the Controllers folder. It contains two methods:

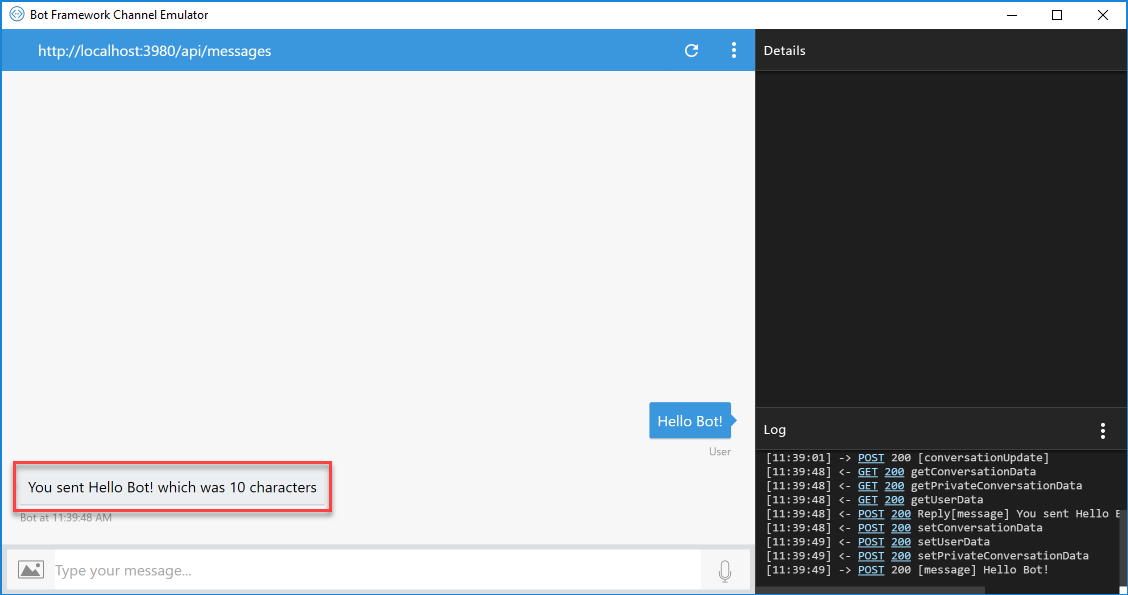
The Post method receives an activity from the user. If the activity type is “Message” it is processed in the Post method. If it is another activity type, it is passed to the HandleSystemMessage method for processing. The boilerplate code in the Post method creates a new Dialog, which simply returns the message the user typed and the length of the message.
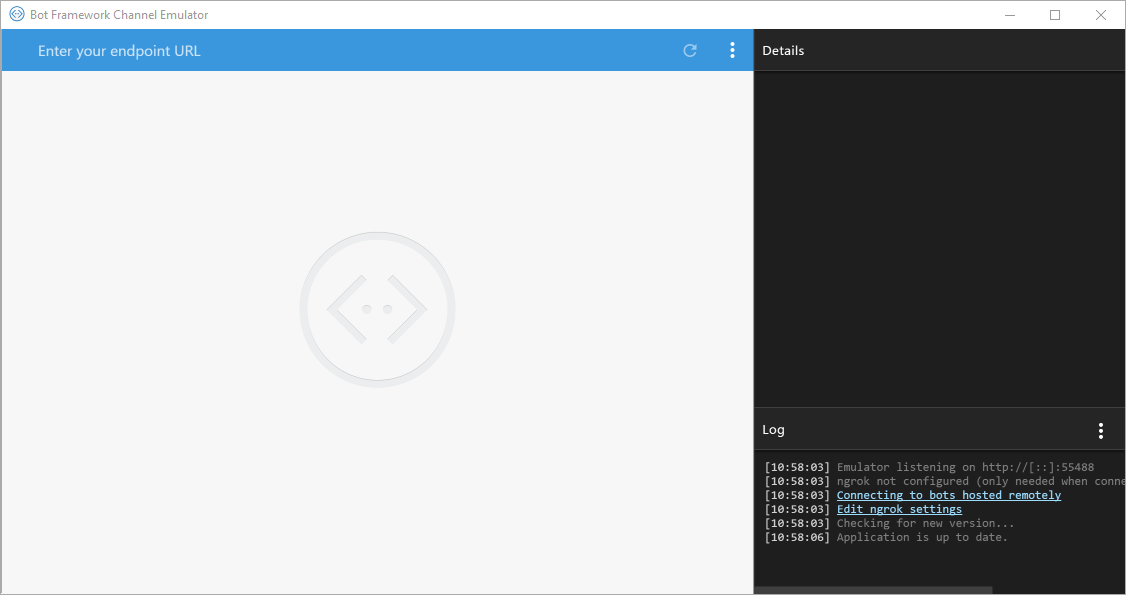
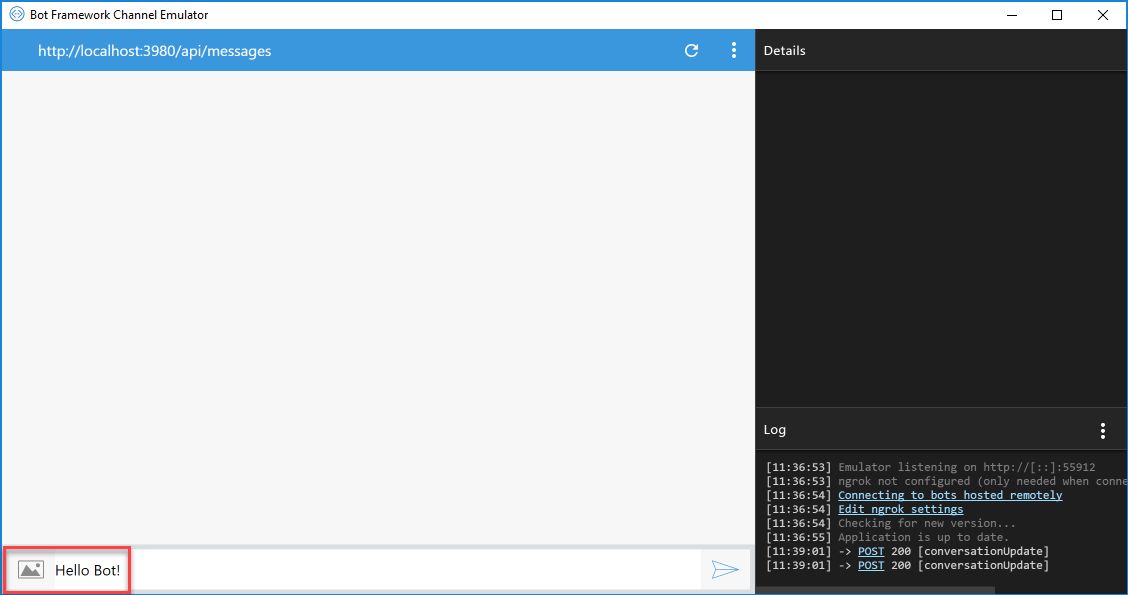
To see this simple bot example run, start the bot emulator. Notice the field to enter your endpoint URL. We will get this when we start debugging in Visual Studio.
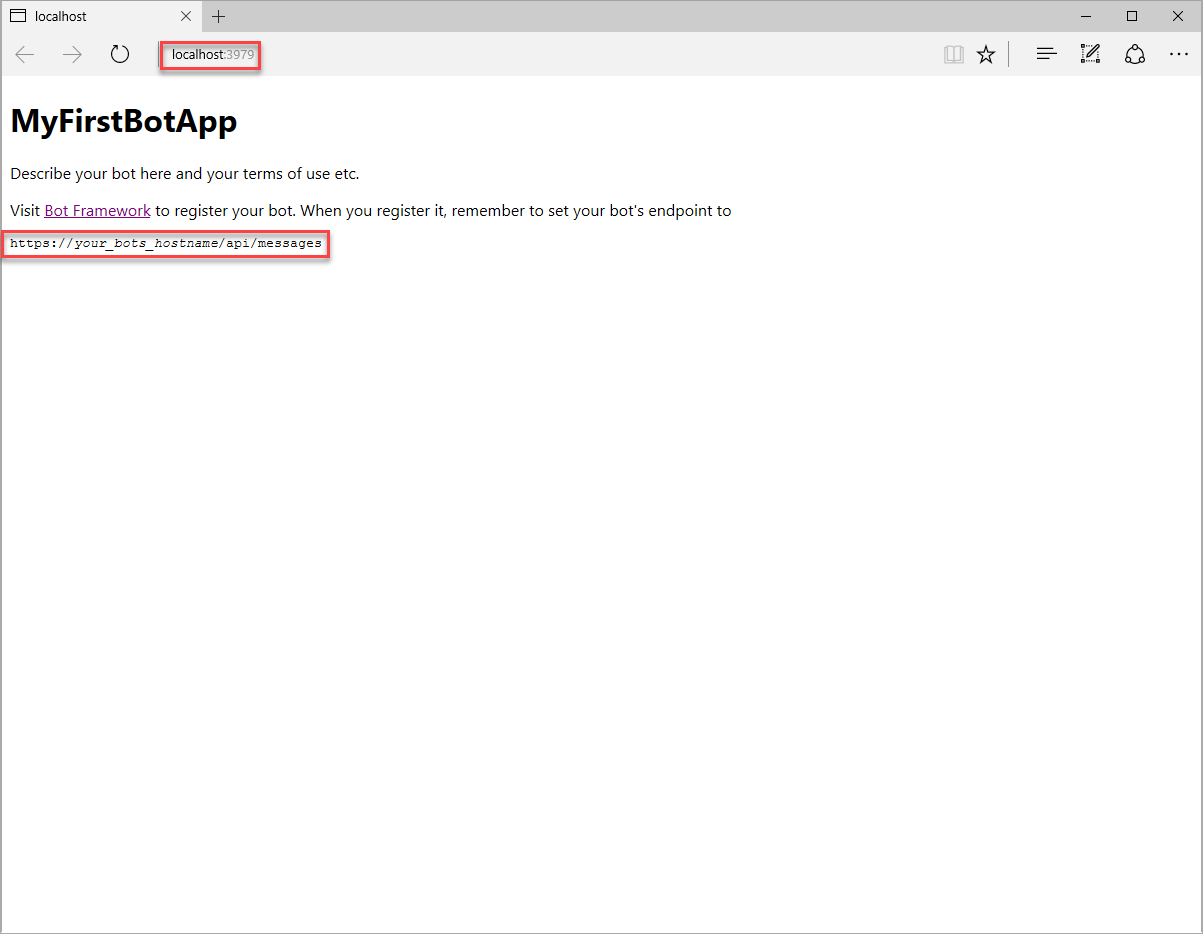
In Visual Studio, press F5 or select Debug->Start Debugging. When the browser window opens, it opens to the default.htm page. Note the url and the message that tells you what to set the endpoint to. In this case, we will set the endpoint to http://localhost:3979/api/messages. (Note that the message uses https, but we do not use SSL locally.)
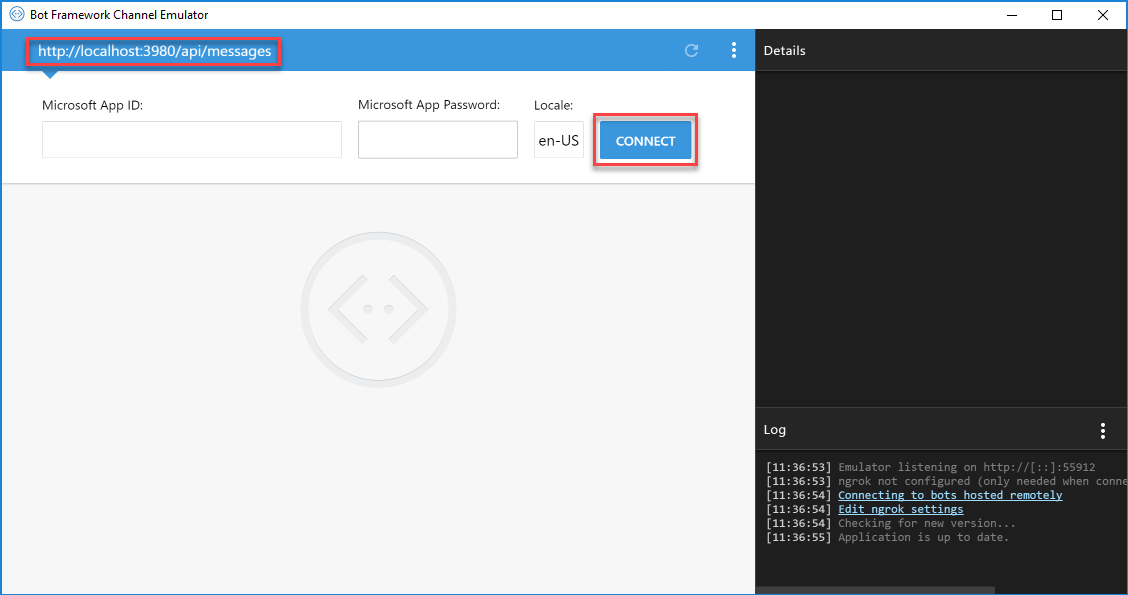
Put that value in the bot emulator and press Connect. You do not need to enter values for Microsoft App ID or Microsoft App Password when debugging locally.
Once you connect, enter a message and either press Enter or click the send button.
Your bot app will reply with the message content and message length.
Congratulations! You have created your first bot application. In the next blog post in this series, we will extend the bot application to connect to a real-time API and customize our bot messaging.
If you would like to download the source code for this blog post, it is available on UDig’s GitHub.

