Part 2 – Integrating Your Bot Application With a Real-Time API
In Part 1 of this blog series, we created a simple bot application using the Microsoft Bot Framework. Now we are going to extend our capabilities by connecting a bot application to a real-time API. For this example I am going to connect to the OpenWeatherMap API. To complete this exercise you will need to register for a free account and get an API key.
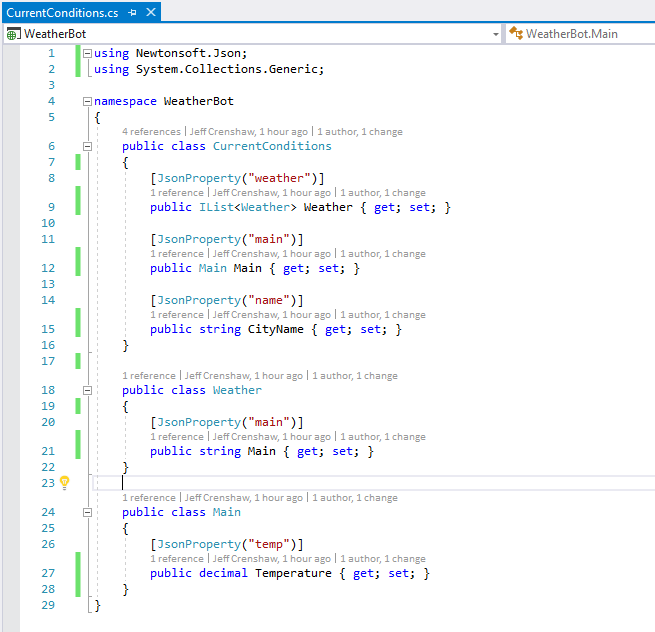
First we’ll create a Bot Framework application just like we did in [Part 1]. I’m calling this WeatherBot. We will need a library to parse the JSON returned by the API, so in Solution Explorer, right-click the project and select Manage NuGet Packages. In the search box, type Newtonsoft.Json and click the Install button to add the library. Now right-click the project and add a class called CurrentConditions. We will parse the JSON into this model. Add the properties and classes shown here. These are just the properties we will use for this example. For a fully fleshed-out class that reflects all the properties returned in the JSON, you can download the source for this blog post from GitHub.
Now right-click the project and add another class called OpenWeather. Add your API key as a string constant and create the GetWeatherAsync method as shown:
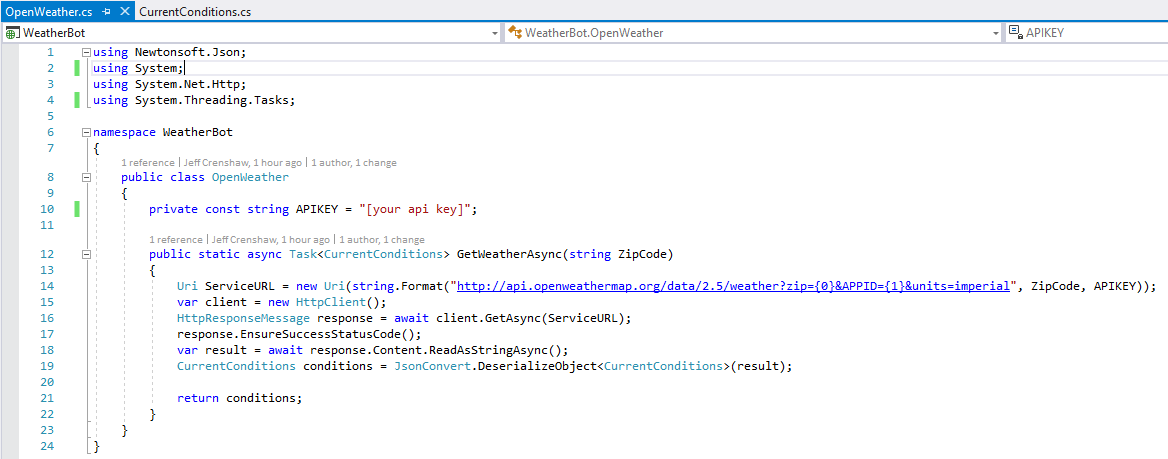
The GetWeatherAsync method takes the zip code input by the user and calls the OpenWeatherMap API to get the current conditions for that area. We parse the JSON into a CurrentConditions object and return that object.
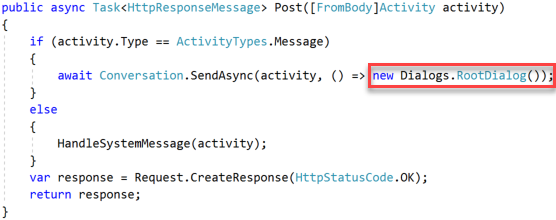
Now, to wire up the bot to call the API. Open the MessagesController class. Note that the Post method takes an Activity object, and if it is a Message type it spins up a new Dialog.
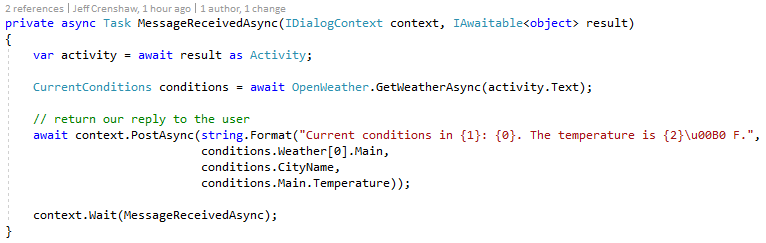
In the Dialog class we will add our code to call the API. When the Dialog is created, it waits for a message to be received. Replace the boilerplate code in MessageReceivedAsync with the following code that takes the input from the user (zip code) and calls OpenWeather.GetWeatherAsync, then formats the returned object into a string to display to the user:
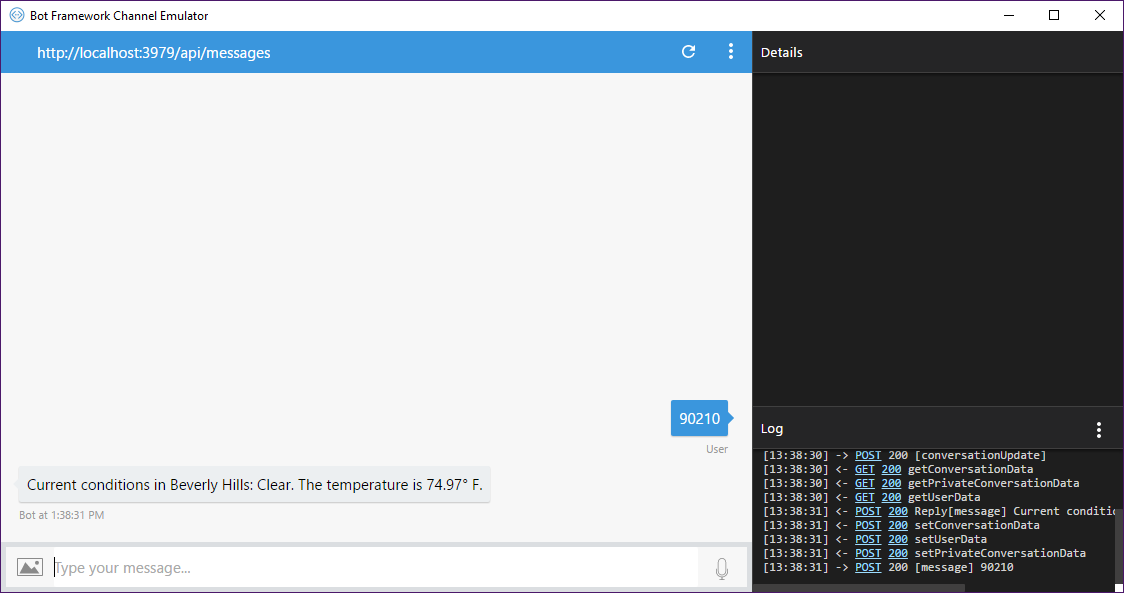
Now when we start the bot app (F5), load it into the bot emulator, and enter a zip code, we get a nice message back:
For a real bot application we would need to add a welcome message and some error handling, and possibly provide more than just the current conditions (a forecast, for example). We will dive into that in the next blog post, Adding Natural Language Processing (NLP) to Your Bot Application with Microsoft LUIS.
Download the source code for this blog post at UDig’s GitHub.


